
In the words of the great Alfred Stieglitz, “Wherever there is light, one can photograph,” which is a statement entirely relevant to shooting in low-light situations.
For those of you just beginning to shoot in the darkness it can be frustrating not understanding why, no matter what you try, your photos are turning out dark.
In this article, I’m going to discuss eight tips for night photography, or shooting in low light, and teach you how your camera settings can work together so you’re photos at night are no longer dark.
Jack Up Your ISO
ISO speed is what determines how sensitive our camera’s sensor is to light. Back in the day this metric was known as film speed, and similarly both are numbers used to measure how the camera will expose the photograph. The higher the ISO, the brighter the exposure.
When shooting at night, you’re going to want this number to be as high as possible. Stop when your photographs begin to show noise and grain. Every camera body is different and so this is a matter of experimentation.
Keep Your Aperture Wide Open
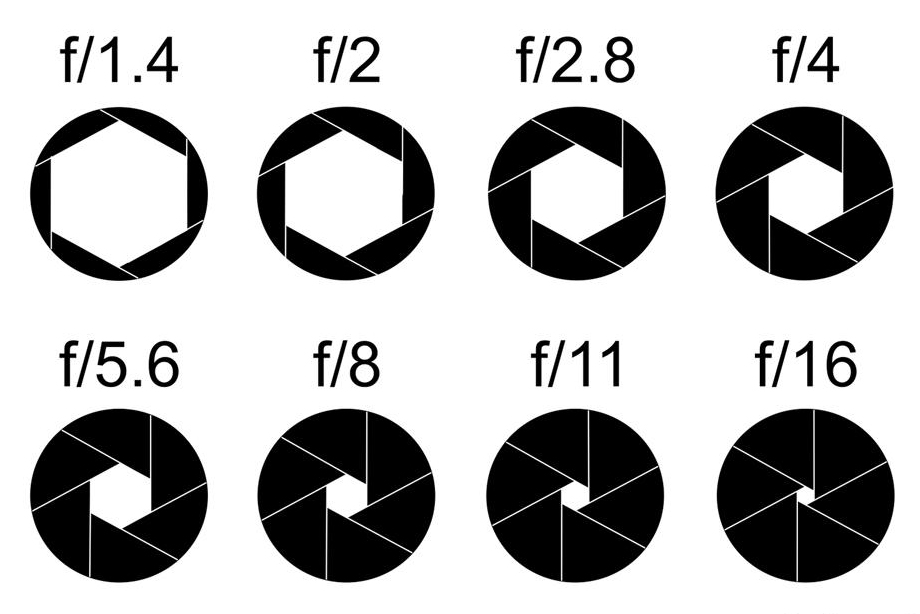
When you’re shooting in low light, you want as much light to enter the camera as possible within a given shutter release. Every lens is given an F-Stop rating, indicating how much light will enter your camera in conjunction with your shutter speed. A low number like F/2.8 indicates the lens is ‘fast’ and will allow a lot of light to enter. A high number like F/22 means the opening is very narrow and minimal light will be able to enter.
Fast lenses require complex manufacturing and are typically more expensive than their slower counterparts.
Use A Tripod!
A tripod is a low-light photographer’s best friend. Having a tripod will allow you to stabilize the camera while the shutter stays open, preventing the image from having any blur. The main reason you’re going to use a tripod while shooting in low light is because your shutter speed will be less than 1/60th of a second (most people can take a photo hand-held as low as 1/60th).
Keep The Shutter Open Longer

Shutter speed determines how long your camera will allow light to hit the sensor. If your aperture is wide open, and you’ve jacked up the ISO, the next option you have is keeping the shutter open longer. Again, increasing the shutter speed beyond 1/60th of a second will require a tripod.
Most camera bodies will allow you to take a 30” exposure, which for most situations should be plenty of time to properly light a scene. The problem with shutter speed is that your subject (And camera) needs to be entirely still, otherwise you may see motion blur.
Create Light With A Flash
If your aperture, shutter speed, and ISO aren’t getting the job done, you can always break out a speed-light flash to illuminate your subject. Depending on how dark your scene is, you may be shooting the flash using a tripod, or holding the camera in your hand.
Speed lights are powerful and might even overexpose your subject if you’re too close, or the ISO is too high. While using a flash keep the aperture wide open, and then dial in your shutter speed and ISO.
As an example the photo below was shot using the following settings:
- Aperture: F/2.8
- Shutter speed: 20”
- ISO 6400
- Fill flash
The model looks perfectly still in the photo, and that’s because she was sitting in complete darkness. Had there been more ambient light there could have easily been motion blur.
Light Painting
Sometimes using a flash may not be ideal due to how brightly it illuminates everything within a given scene. If this is the case, you can use a small flashlight, or even the LCD screen on your phone to “paint” over your subject, giving you a lot more control in what the added light will be reflecting.
Painting light over your subject only takes a few seconds, and so always check how the photo came out on-screen to make sure you didn’t overexpose your subject.
How To Focus
One of the biggest challenges to shooting at night is keeping your photos in focus. There are two main strategies for getting your scene in focus:
- Find the infinite focal point on your lens — A lot of lenses have a focal point known as the infinity focal point. It’s here you can set the focus to manual and keep it locked to ensure everything is nice and sharp. If your lens has an infinite focal point it’s indicated by the infinity sign on the focus ring.
- Use a bright light — If your lens doesn’t have the infinity focal point, you can manually focus by using a bright light, pointing it at your subject, and locking in focus by looking through your viewfinder.
Post-Production
Part of capturing stunning night images is knowing how to take the images you capture, and enhance the light even further in post. For those of you using Lightroom or Camera Raw (Adobe Bridge), here are the most common adjustments I’ll make to photos shot at night:
- Adjust exposure (usually increase)
- Play with contrast, whites, blacks and vibrance
- Reduce noise
Eventually, you’re going to see shooting at night usually requires very similar settings. With repetition you’ll begin to rapidly improve over time.
If you have any questions feel free to leave them in the comments!


