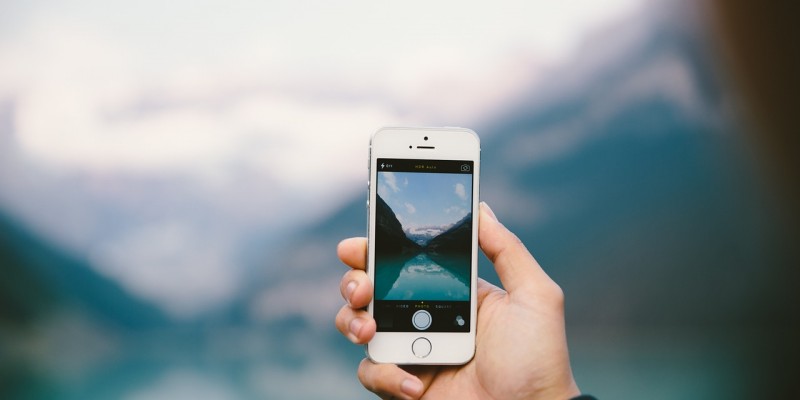
There are approximately 1.8 billion photos uploaded to the internet every single day. It’s no wonder people have invested so much time and effort into trying to make their images stand out on social media.
In order to bring your photos to the next level, here are five photography tips for social media success that you should consider every time you make a post online.
Framing and Composition

If you’ve ever taken an art class or have read anything about photography composition, then I’m sure you have seen something about the rule of thirds. 35mm film cameras of the past set the precedent for how we view imagery by creating rectangular images. Most digital cameras produce photos with an aspect ratio of 3×2 (width by height), which automatically encourages our mind to see a photograph in thirds.
Rather than placing your subject directly in the center of the frame, attempt to shoot your photos with the subject in the left or right third of the frame. This technique stimulates a viewer to spend more time looking at the photo than if the composition was directly symmetrical.
However, since the advent of Instagram and the rising popularity of square photos, sometimes placing your subject directly in the center of the frame can have a very pleasing effect.

While the image above does not have an aspect ratio of 3 x 2, the rule of thirds can still be applied vertically to the horizon lines, as well as the levels of depth (foreground, mid-ground, and background). Creating dynamic compositions will not only draw in more viewers, but give people the perception that your not an amateur at photography, and your content is worth following.
Resolution

One of the biggest mistakes made with social media imagery is uploading files that may be too small for viewing on all screen sizes. Even though a whopping 51% of all media is now viewed on mobile devices, 42% of people still prefer viewing media on a desktop.
With Facebook’s Fullscreen viewing mode, an image that is only 400 pixels wide may look completely out of focus to those viewing on a large laptop screen. Part of creating powerful social media posts comes down the quality of your content, including resolution.
In order to avoid viewers seeing your photos in low-res, upload files with at least 1000 pixels on the long side. Personally, I always upload to Facebook with a minimum of 2000 pixels on the long side should someone want to view my work fullscreen.
Effective Editing

Social media has made it possible for photo editing to go mainstream. The hashtag “#NoFilter” rose in popularity so quickly because millions of people became aware and agitated by how filtering affects the authenticity of certain images, as well as the look of colors and clarity.
There is nothing wrong with filtering for creative purposes, often times a filter is a way to add artistic expression. However, there becomes a point at which filtering and using the editing options on mobile apps becomes a little over the top.
In order to make your images ‘pop’, without exploding them, try enhancing a few of the following:
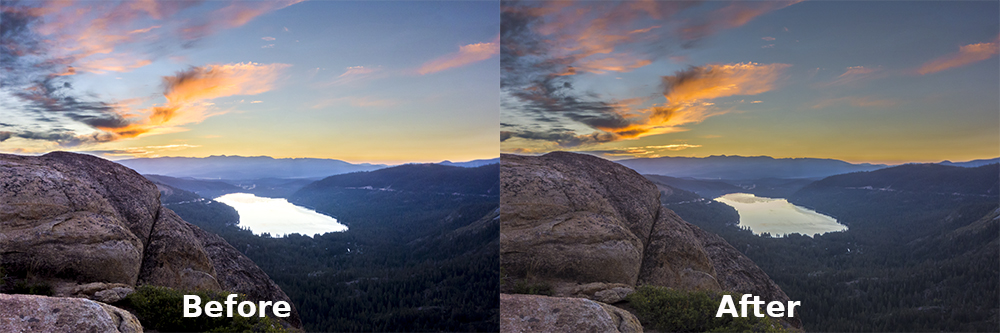
- Adjust your photo’s shadows and highlights to give it a look true to real life. Since our cameras can only see in stops of light, the shadows and highlights are usually too dark, or overexposed in high contrast lighting (see below).
- Slightly bring up the vibrance, not the saturation, when attempting to make your image more colorful. Over-saturation is a tell-tale sign you over-edited the photo.
- Crop your image to achieve the rule of thirds, and straighten the alignment so your horizon lines aren’t crooked.
Put A Story Behind The Image

One of the best strategies for sharing meaningful content is taking the time to understand your audience and what they’re looking for. Far too often people post photos that are only intended to satisfy themselves (Selfies, Photos of Lunch, Subtle Brags), which isn’t a good way to grow an audience. In addition to good photos, tell people what’s happening in the photo, or write something inspirational! Everyone loves seeing beautiful scenery, but what does it mean to you?
By pairing your images with good writing you’ll be able to keep your audience’s attention for longer, which will help them to remember your brand long after they log off.
Hashtags and Sharing
If you’re not satisfied with how many people your photo’s are reaching online, take some time to research different groups and hashtags your photos can be seen through.
Facebook has thousands of different groups to join based on common interests. If you’re an avid landscape photographer, get involved with several communities and expand the reach of your favorite photos. More than likely those who see your work in these groups will head back to your photography/business page to see more of your content.
Instagram is the king of hashtags. With up to 30 allowed per post you have the opportunity to get your photos seen in all kinds of different categories and trending topics. Rather than bombarding your headline with 30, put all of your hashtags in the first comment so they’ll disappear after a few people comment (Not everyone loves seeing hashtags, but they are effective!).
Do you have any questions about how to improve your social media photography? Share them in the comments below!


